Tuesday, August 24, 2010

Love It Tuesday: Selfish Little Me

Now I know this post has nothing to do with renovating, or the house.. BUT the title of the blog is LIVE, LOVE, LAUGH too soooo this is all about living, loving and laughing!

A friend asked me over the weekend what I would like for my birthday (which is still more than 3 weeks away) and I honestly couldn't answer. Everything that popped into my head was for the house or for the baby or even for Ryan.. it was all things that we needed but NOT things I actually wanted. And so I sat and thought about it some more... normally I would have responded with clothes... but alas being pregnant and getting clothes that you can't fit into for possibly the next year is kinda depressing. Then it hit me... I would LOVE anything that makes me feel good about myself and happy. I would like something that makes me smile and when I am 8 months pregnant and looking like a whale I can pull out and it will make me feel sexy or fun and none whale-like! So this year I plan on being selfish on my birthday and asking for things JUST FOR ME!!!! With that said, this weeks Love It Tuesday is all about things I have come across that I LOVE... for me.. and no one else!!! HAAHAA!!

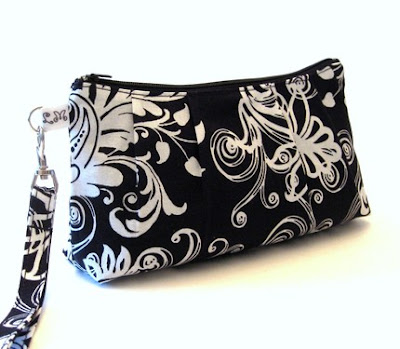
One of my favourite past times is browsing through Etsy.com and checking out the fun things that people make/sell. Today I came across LM Creations which is a Toronto store that sells AWESOME purses and clutches etc. Some of my personal favourites from this site are:


Or anything from Bubble Tub Soaps which is another Etsy store based out of Barrie.

What better way to feel fabulous than to use Apple Martini scented cream! If I can't drink an apple martini I may as well smell like one!!!


I'm telling you all of their products sound like they smell FABULOUS!!!!

OR these super sexy boots from Aldo Shoes I LOVE these boots!!!! As they say "New Shoes Cure the Blues!!!" SOOO TRUE!!!!


Photo Source: www.aldoshoes.com


I discovered this Etsy store awhile ago when shopping for a birthday present for my Grandma. This is Daisy Patch Watches and they make the CUTEST watches with interchangeable stylish watch bands. I ordered a few for my Grandma and they are honestly awesome!!!! I love them!!!


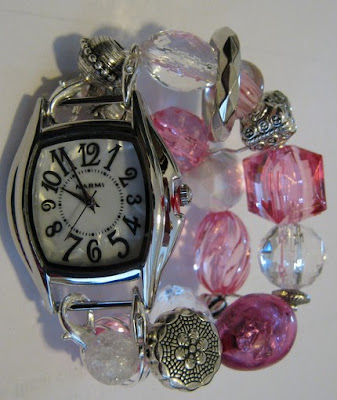
Photo Source: http://www.etsy.com/shop/DaisyPatchWatches?ref=seller_info

I also came across these dresses from Kolon Clothes which I believe is out of Thailand... I just LOVE these dresses though! Not sure if I could actually get away with wearing them while pregnant though... but none the less they are cute!!!

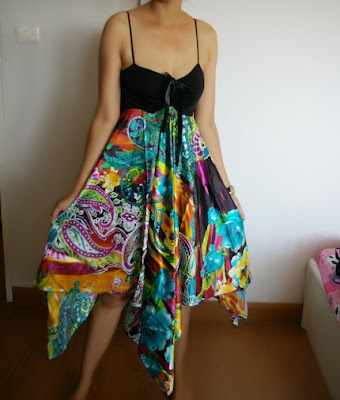
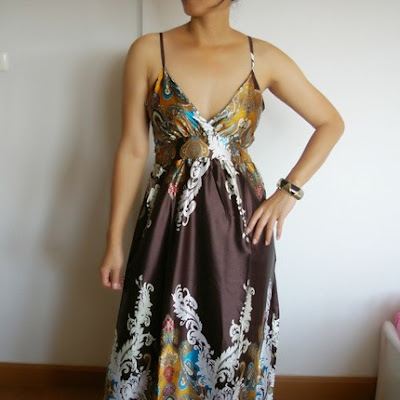
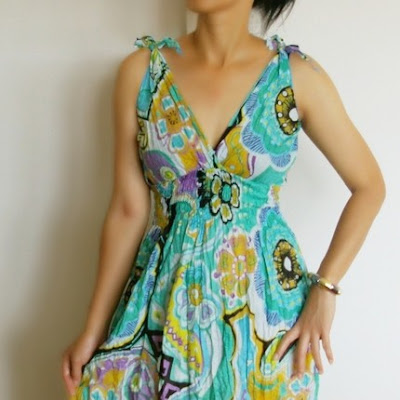
Photo Source: http://www.etsy.com/listing/54489393/new-sexy-multicolor-maxi-dress-sml

Alright that's enough of my selfish Love It list! haahaa!!!! I promise I'll be back on topic with more home projects soon!!! Actually I just ordered something for the nursery today that I am VERY excited about... its small but I think its going to look amazing!!!! Plus I'm Ikea shopping tonight for more storage solutions so I'm sure I'll tell you all about it soon.

Monday, August 23, 2010

Toilet Adventures

Where to even start... this is one of those incidents that would ONLY happen to Ryan and I. This once again proves that nothing with our house comes easy!!!! Anyway, here goes.. on with the adventures in toilet shopping!!

Last weekend Home Depot had a wonderful toilet sale. They had 4 toilets on sale and since the City of Toronto gives a $75 rebate when you buy a dual flush toilet one of the 4 toilets was literally only a $0.01! That's right a penny!!!! It was a Pegasus dual flush toilet and it was the perfect size for our bathroom, MUCH smaller than the old behemoth toilet! Ryan and I were VERY excited about this because we have needed a new toilet for our upstairs (and currently only) bathroom. Our old toilet was an ENORMOUS toilet plus we had recently discovered it had a crack in it and knew it was time to get a new one SOON. SO off we went last Sunday to Home Depot and waited in line before the store even opened to get our penny toilet. We were lucky (maybe lucky isn't the word after you hear the whole story) to get the VERY last penny toilet! We went to pay our $0.01 at the register, put the box in the car and were all happy!! When we got home we noticed the box was a little squished but thought nothing of the matter. We joked about how we'd open the box to find it broken but it was just the corner of the box that was squished so literally Ryan brought the box in the house and left it unopened for a week.

Friday I'm on my way home from work and Ryan calls me to tell me he was installing the new toilet! I was super excited about this!! SO he took the old toilet off and put it out front (in our neighbourhood, you can put ANYTHING on the front lawn and it will disappear in seconds) BUT in the process the old toilet cracked and bit the dust. Oh well no big deal really! (at least that's what Ryan thought). Then Ryan discovered the old toilet had been held in place with shims and other stuff that is NOT supposed to be used to install a toilet. SO he spent some time fixing the plumbing and whatnot. As I'm about 5 minutes from home I look down at my phone to find that Ryan had called me NINE TIMES! SO I immediately called him back wondering what was wrong. WELL after getting the old toilet out and breaking it in the process, and fixing the plumbing he FINALLY opened the box to the new toilet to find that the tank of the toilet was in a million shattered pieces. Yes that's correct... brand new penny toilet was USELESS!!!!

Instantly I was like well we'll just go exchange it... BUT I couldn't find the receipt for the life of me!!!!! I searched everyone for it (I'm normally VERY good at keeping all receipts in my purse for a long time) but couldn't find it. We took the broken toilet back to Home Depot and explained our situation. The lady said there was no problem exchanging it for the same toilet, she even let us know there were 11 of those toilets in stock. Ryan and I skipped to the toilet aisle to find NOTHING where the Pegasus toilets were supposed to be. We asked about 4 people for help and none of them could find anything either.... So, slightly depressed we walked back to the customer service desk and explained they didn't have anymore. The man (the lady was busy so we had to reexplain everything to someone new) said that since we didn't have a receipt he could only give us $75.01 (plus taxes) back. Which was basically our $75 mail in rebate (which home depot got directly, and our penny). BUT our problem was we NEEDED a toilet and the dual flush toilet they had in stock, made by Glacier Bay, was $149.99 (plus taxes). That meant we would be paying about $83 (after taxes) out of our own pockets... NOT the same as the penny toilet!!! ARGH!!!

THEN my mathematical mind started to work because the weekend before the Glacier Bay toilet had been on sale for $40. SO if we paid $83 today for that toilet PLUS we could send in for the City of Toronto $75 mail in rebate we would actually only have paid $8 for a toilet that had been on sale the weekend before for $40!!!! YES THAT IS CORRECT, we actually somehow managed to save ourselves $32 if you look at it that way!!!! I explained my math to Ryan and he was instantly excited!!! PLUS the new toilet came with a wax ring and we had bought one for the old (smashed) toilet SO after returning that we ended up only paying $5 for a brand new dual flush toilet. Mind you it took us about 1.5 hours at home depot to get this all sorted out... BUT it was still totally worth it!!

Ryan successfully installed the toilet Friday evening and we both LOVE how little it is compared to the old one! NOW the only problem we have is that we never fully painted behind the toilet, we were a little bit lazy, because the old toilet covered it all. Now I have to paint the wall behind the toilet because it is completely noticeable... especially since it is wood panelling.. ewww!!! Oh well! That is one more project to add to the long list of projects!!

Other than installing the toilet we took it easy this weekend and didn't get into too many projects (other than deweeding our backyard!!!). We did buy the supplies to make another radiator box though... that should be FUN... haahaa lets hope it isn't as difficult as the last one!!!!

Tuesday, August 17, 2010

Love It Tuesday - Capiz Chandelier

Ok, I was searching for something to write about for today's Love It Tuesday AND I came across this which is PERFECT. Its more perfect because I started making a vellum paper Capiz look chandelier about 2 months ago and got stuck because I couldn't find what I was looking for to hold the strands of the vellum paper and it has been sitting in my desk for the last 2 months. Every once and awhile I look around for something but have been at a loss for what to use. THEN I came across this wonderful tutorial and LOVE IT!!


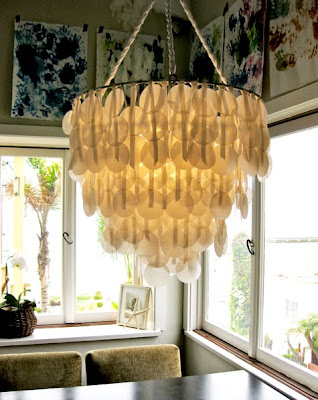
(photo source: designspongeonline.com)
You can view the whole tutorial that they used here.
I started this project differently because I wanted coloured 'shells'. SO I bought vellum paper and some special paint markers and coloured in (not completely... I left it kinda scribbled so it looks marbly (thats a word because I say it is! heehee)) I used blue and yellow markers as this light fixture is to go in the kitchen above the table. Then I used a ridged circle paper hole punch to punch out a bunch of 1 inch circles. I then attached them together using jewelry rings (the really small ones) SO my light is almost ready EXCEPT I couldn't find anything to hang the strands from!! BUT a hanging basket would work wonderfully!!!!! I'm going to have to run to the dollar store today and see if I can find one!!! This is what I wanted mine to look like (just not as long and in blue and yellow). This light shade is sold at PB Teen for $129USD. My light shade to date has cost about $25.

(photo source: http://www.pbteen.com/products/capiz-chandelier/)
The only thing that I had to double check was that the vellum wouldn't burn. I turned a light on and had a piece of vellum sitting right on the light bulb for over an hour and it was fine. It didn't do anything at all actually! Plus the way I plan on making it the strands will be far away from the light bulb itself. I'm VERY excited about this now!!! I've been a little bit upset at myself for not finishing this project!!!

Monday, August 16, 2010

LOOK WHAT DAD MADE - Tree Shelves

Last week while my mom and I were painting the kitchen cabinets my dad spent one day very busily making my tree branch shelves!!!! I was sooo happy with them I couldn't WAIT to paint them and put them on the wall!! That was yet another project that was completed over the weekend.


Enough of the chit chat... here are the shelves!!


Don't they look fantastic!! Ryan and I couldn't be happier, Ryan actually painted them because I was too busy and he couldn't wait to put them up. We'll have to get some more books, those were just some I had lying around. The tree is almost complete... all that is left is the owl hole shelf and the owl itself. But those will come much later!!

THANKS DAD (yet again!!)

To see other posts about the nursery you can go here, here, here and here.

Sunday, August 15, 2010

THE BIG KITCHEN REVEAL!!

It has taken a long time and a lot of elbow grease BUT it is finally done!!! Just to recap shortly what we did to the kitchen.

Step 1 was to clean the kitchen top to bottom. Then we installed new flooring. Both of those can be seen here.


Step 2 - We installed wallpaper over the cabinets to add some colour. You can read that here.


Step 3 to 1001 - We added trim, painted and hung the new lovely doors. As well we spray painted the handles a lovely hammered silver. You can read all about that here, here, here and here. (yes it was a long process!!)


To get on with it, here is a reminder of what the kitchen looked like about 2.5 years ago. (Isn't my mommy cute... she was still smiling before she started cleaning that kitchen)


Here is another before picture of the kitchen JUST before the cabinets were done.

AND (drum roll please....) THE FABULOUS AFTER!!!!

Isn't it a FANTASTIC transformation????? We are soooo happy with the outcome!!! A few friends have been over to see it and LOVE it!! It looks like we paid a couple of thousands of dollars for it. AND now comes the total cost....
*Paint = $120 - Should have only been about $85 BUT I did the stupid mistake of buying the wrong colour paint... ARGH oh well it worked out in the end!
* Trim and nails - $100
* Wallpaper - $50
* Carpet and Accessories - $30
That comes to a whooping $300!!!! If you remember back when I was planning out my kitchen reno I had hoped to come in under $400 and I successfully did it!!!!


Saturday, August 14, 2010

When The Bell Breaks This Cradle Won't Fall

Ryan and I would like to thank my parents SO much for our fabulous new crib!!! I have been waiting to set it up all week long!!! Now that I'm home from vacation it was one of the first things to be set up!! Ryan decided he would set it up, I came into the room to find him inside the crib screwing it together NOT thinking that he would get stuck in there! HAHAHAHA


Luckily he could squeeze out underneath the crib. Doesn't it look FANTASTIC!!!! I'm SOOO happy with it!!! We still have to get a mattress but that will come eventually, no real hurry here!!

Here is the view of the room from the door. I LOVE IT!!! I think it looks fantastic!!!
The shelves for the tree are made and just need to be painted. Hopefully we will be able to install them tomorrow!


Thursday, August 12, 2010

Kitchen Cupboard Reno Part 4

THEY ARE DONE!!! After yet another frustrating start to yesterday we finally finished the last coat of paint on the cupboards this afternoon!!!


Yesterday I got up out of bed lazily (since I'm on vacation) and eventually made my way outside to paint the first coat of paint on the back of the cabinet doors. I had everything set up and ready to go and I opened up my nice can of supposedly WHITE paint. It looked a little oily and yellow so I thought huh must just need to be stirred.... WELL no amount of stirring could change the paint into white paint... it was yellowy ugly beige. Completely confused because in my mind when you buy a can of paint straight off the shelf it comes only in white I read the front of the can to find that it was NOT white it was called 'Accent Base' which I have discovered is used to tint different colours of paint. ARGH!!! There was plenty of screaming and I believe I kicked something at this point. I was SO frustrated. Especially since I was the only one here and had no car and of course my mom was in town and could have grabbed a can of paint for me while there BUT she NEVER turns her cellphone on. SO I sat down on the ground and waited. And paced and waited.


When my mom showed up her initial response was "why didn't you call me..." then she stopped short and remembered her cellphone is never turned on. SO after putting away the groceries we made the trip back into town (its only 20 minutes BUT its still annoying) to pick up a can of WHITE paint. We managed to still get in a coat of paint on the front and one on the back yesterday so it didn't set us back at all.


Today we finished the last coat on the front and on the back and it feels great. And more importantly it looks FABULOUS!!! I'm SO impressed with the doors!!!


I can't wait to see how they look in the kitchen!! Stay tuned for that on probably Sunday!
To see other phases of the kitchen reno you can find them here, here and here.

Tuesday, August 10, 2010

Kitchen Cupboard Reno Part 3

Today was a VERY frustrating day! (not to mention I just wrote out this post and then in my tired state I deleted it!! BOOOO) I woke up this morning to find 2 things had happened during the night with my cabinet doors, neither of them good.

1) It was so humid last night that the doors did NOT dry... AT ALL!! When I touched them this morning they were just as wet as when I had painted them more than 12 hours before. Set back... ARGH!

But worse than that!!!

2) A STUPID RACCOON got into the tent (which we had sealed off) and decided it would walk all over half of the doors leaving its muddy paw prints all over!!! AHHHHHHHHH This is what the doors looked like this morning... can't you see the thrilled look on my moms face!


So we opened up the tent and hoped the humidity would lift and the doors would dry at some point during the day. This set me back a half a day because I knew I would only get to prime one side of the doors today. In the meantime I relaxed and read my book and went for a nice walk with my mom. By the afternoon the paint had finally dried so it was time to get to work.

Since the footprints had been left in the paint this meant sanding down the foot prints as to make them disappear. My mom took on this task as well as filling any nail holes and other anomalies with Polyfil to hide it.

While she was doing that I decided it was time to pull out the spray paint and get to work on the handles. I had chosen this hammered look spray paint for the cabinet handles and had no idea what to expect!
I have to say it turned out PERFECTLY! I LOVE the new handles!! I did 2 coats of this letting it dry in between coats for about 2 hours. Don't they look fantastic!!! I can't wait to put them on the doors!!!!


After my mom had sanded down a few doors I was ready to start painting. Now this proved to be just as frustrating (to add to the day). There was a slight breeze blowing and it caused the needles on the trees to fly into my freshly primed doors. So every 5 seconds I had to stop to pick it out of the paint. After this went on for about an hour I finally gave up. Well no it wasn't JUST that that made me change everything. A chipmunk decided to run into the tent and although it didn't walk on the freshly painted doors it DID decide to kick up the dirt ALL OVER my freshly painted door. To which I had to completely repaint those doors! ANNOYING!!!
At this point my mom and I were frustrated beyond belief! SO we pulled out the fold out tables (no idea why we didn't think of this before) and put the doors that were giving us problems up on the tables out of reach of raccoons and chipmunks. This made things 10 times faster as I didn't constantly have to stop and pick out chunks of stuff from the paint.
Anyway... it took FOREVER to do the second coat of primer today and when it was finally done it was swim time. The doors look great so far (even though they are super frustrating).
Tomorrow I will start the day off by painting the first coat of paint on the back of the doors and then letting them dry. Then later in the day I will hopefully be able to paint the first coat on the front of the doors... of course that depends on the humidity!! Keeping my fingers crossed!!!
To see the other phases of the kitchen reno you can find them here and here


Monday, August 9, 2010

Kitchen Cupboard Reno Part 2


Today was day 1 million and 83 of the kitchen reno project! haahaa! No not really... just feels that way. I am not a patient person so its taking too long already! haahaa!! Anyway, today I primed the front and back of the doors and primed the handles as well.

We started by priming the back of the doors first. Since it is so humid up here (94% humidity today) I knew it would take forever to dry. So we primed the back first thing this morning and then headed into town to run some errands. Then later on this afternoon (after the big rain storm that delayed my painting yet again) we (my dad and I) primed the front of the doors. The primer went on the back of the doors fabulously.
After the rain we got out and started priming the front of the doors. We found that the primer didn't cover as well as it did on the back of the doors because the front had a high gloss finish on it. SO yet another set back, we're going to have to do 2 coats of primer on the front of the doors. BUT don't they look GREAT so far!!!
Then it was time to prime my handles. My mom came up with a brilliant idea to put them on the ends of shish kabob skewers and shove them into some foam. My dad pulled out a piece of foam that he had lying around and it worked perfectly! I could spray the top and the bottom all at once.
Being a little bit pregnant I was a good girl and wore my mask. (PS there is no belly yet... I was wearing Ryan's shirt to paint because my paint clothes hadn't been washed yet). My mom was supervising! :-)

All in all the doors look GREAT and I expect to be finished by Thursday afternoon with everything!! WOOHOO!!!!


Wednesday, August 4, 2010

Kitchen Cupboard Reno Part 1

I AM ON VACATION!! Its been fabulous so far!! Ryan and I had a great relaxing long weekend up at the cottage with the family and my cousins and their 1 year old son were here too. It was a great long weekend! Ryan had to head back home to work this week so its just me and my parents relaxing up here. Yesterday we went into town and bought the trim for the kitchen cabinets.. AND A CRIB for the blueberry!!!!!! Stay tuned for that post probably next week when we get it set up.
Just before we start remember this is what my cabinet doors/kitchen looked like originally. As you can see the cabinet doors are just slab doors. There was nothing wrong with them, I just decided the kitchen needed an upgrade so we're adding trim and going white!!

Yesterday afternoon my dad and I got to work sanding the cabinet doors. We set up my workstation for the next week and a half. Isn't it awesome!!! It keeps out the rain but definitely does NOT help with the humidity. We set up the tent to keep the bugs and rain off of the cabinets which has worked!!


Yesterday we set everything up and I started to sand the cabinet doors down while my dad took the side strips off the cabinet doors. We decided to take them off because of 2 reasons: #1 - they were half peeled off anyway and looked awful and #2 They weren't on ALL of the cabinets... someone had only put it on the spots they thought it was needed so it looked funny. After peeling them off we had to scrap off the glue and sand down the edges to make them smooth. I got to get out the power sander!! :-)


I would like to note that it was about 40 degrees with the humidity yesterday and my dad and I were dripping in sweat!!! SO today I was smarter... I did it all in my bathing suit and periodically jumped in the lake to cool off!! This morning (while my dad was golfing) I got to work finishing up the sanding. My mom worked on marking where the trim would be added. We decided on adding the trim 3 inches in on all sides to make sure everything is even and when hung looks symmetrical. Since every cabinet door is a different size (don't ask.. I think a 5 year old cut our cabinets) this is the best way to make sure it looks good and not wonky. It took my mom and I about 2 hours to finish up the sanding and mark all of the cabinet doors.

When Dad came back it was time to get to work cutting the trim. We measured the pieces and Dad and I cut them out. We were at it for about an hour before a big thunderstorm rolled in and forced us inside. Which was just fine with me because I'm JUST about finished a book I'm reading and am DYING to find out the ending! (once again I was working in a bathing suit and a towel... probably not the safest outfit BUT when its this hot there are NO alternatives!!)


After 2 rain storms interrupted us we finally had all of the pieces cut and placed in place. That's 21 doors we had to cut trim for!! BUT it looks GREAT so far!!!!


Don't they look fantastic already???? Tomorrow we plan on sanding down the trim edges and if we have time gluing and nailing the pieces in place. I have to head back tomorrow so hopefully we can fit it in. Then next week we will be painting them white!!! I wanted to paint the hardware BUT since its soooo humid there is NO point in painting because it will never dry!!! Alas the weather is a set back. More on my kitchen cupboard reno probably next week!!!