
Just to remind you this is what I was working with. Now since we are just using furniture that we already had we had a LOT of space on the upper half of the one wall that was just wasted space. I knew I wanted a shelf up there to store books and toys etc. We need all the storage space we can get because we have no closet for the blueberry and since it is a small room we have VERY limited space for storing baby items.

My brother and sister in law just bought a house over the summer and when we were there helping them with their deck (check that out here) we were rummaging through some things the old owners had left behind. We came across a bag full of these decorative pieces of wood. At the time I had no idea what we would do with them but we grabbed 4 of them. Once I realized I wanted a shelf in the babies room I knew these would work out perfectly and tie in with the tree as they are swirly and fun!
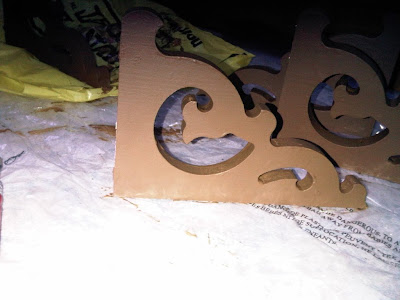
So Saturday I primed them with a spray primer... I used a spray primer only because its the only primer I could find since the guys were working on the basement all of the cans of paint were hidden behind furniture so I resorted to spray primer. It took FOREVER to dry!!! Next time I will not be lazy and get the normal primer!!! That meant that on Saturday I only managed to prime them and paint the first coat of brown. Why brown you may ask?? WELL Ryan and I picked up the shelf wood and opted for the pre-painted MDF for the shelf itself. Now I could have painted the decorative pieces in the same colour as the trim BUT they wouldn't have matched the colour of the shelf and there is no point buying a pre-painted piece of wood and then painting it!!! Then I thought about painting them the same green as the walls but I wanted them to pop out. So I opted for the same brown as the tree to give them some pop and to tie the tree into that side of the wall.
Sunday I finished the second coat of paint on them and cut the shelf down to size. I placed the shelf in place and noticed that since the shelf was so long it sagged in the middle. I had completely expected this. I knew the 2 'decorative' pieces would have to act as supports for the shelf. What I expected the hard part to be was having the 2 middle pieces even across the wall WITH hitting studs because I didn't want to have to rely on drywall plugs to support the shelf as I have no idea how heavy the stuff on the shelf will be. WELL I got lucky!!! I measured the length of the shelf and marked exactly the half way point. My plan was to measure out from the half way point on each side and put the decorative support piece in place. WELL right in the middle of the shelf there was a stud!! I was SO excited!! I managed to get both decorative pieces screwed into a stud, oh it was a happy day for me! Yes I know its not super exciting but honestly I hate it when you have something in mind and its ruined because you can't find a stud... heehee!!! I like to think we have the perfect stud in this room!!. Then I just screwed the other two pieces into the sides as decoration... they have no structural purpose I just think they look nice. And that was it for my shelf!!!

I would like to note that even though the pictures make it seem like everything is crooked it is not... its very hard to take a picture of the entire shelf because the room is so small I had to squish against the wall.

Notice the boxes on the shelf. I bought those 2 boxes at Loblaws for a total of $5. I loved how they had a chalkboard on the front for writing what is in the box! Now I know I could have easily made them but for $5 for 2 boxes I decided to save myself the hassle and just buy them!!

For added storage space I plan on getting some baskets to put on top of the desk on the left in the pictures where I can store the diapers etc. And the space that is between the wall and the change table is where the dirty diaper bin will go, we had to leave the change table that far away from the wall so that you can open the doors and the drawers. This room is just about finished.. I just have to finish up the animal decals, the rad box (which should be done this week) and the owl hole in the tree!!
I'm glad you could use those! we forgot about them. I needed some brackets for shelves in our bathroom, we're on our way to the basement right now to see if we can use the rest of them! thanks for the reminder hahahaha Looks GREAT in there!!! The boxes are cute!
ReplyDeleteI found the brackets under a pile of stuff in the basement and was like OHHHH these would be perfect!!!
ReplyDelete