Monday, March 26, 2012

Creating Holes....


Our house came with all of the baby gates already installed and we LOVED that about it.  It meant we didn't have to deal with buying and installing them ourselves.  However, we found that the gate on the main level just didn't function for us! It was installed just off the kitchen to keep kids from going down the back stairs, however it also kept people from the main floor bathroom.  Which meant anytime we had people over they had to ask to use the bathroom because if you don't have kids you have no idea how to open a baby gate.  Plus on top of that our baby gate was a little finicky and involved not only squeezing the lock but a little push and pull to get it to open.  This was driving us nuts. In addition, I have always thought down the line when Norah is out of diapers I can just picture us running her to the bathroom and not being able to get the gate open in time and have MANY accidents in the hallway. This just wouldn't do.   I forgot to take a before picture but this is the best I can do.  This is the gate I'm talking about, the bathroom is beyond the gate to the right and the basement stairs to the left.


The reason they put the gate there was because at the top of the stairs it has to sit on a slight angle to fit... we didn't care, we chose the slight angle over the frustration of always having to open the gate for guests.  Ryan unscrewed the gate to find they had attached it with butterfly clips... needless to say what we thought would be small holes to patch turned into this... a toonie sized hole!!


Luckily patching holes in our house is pretty easy since the plaster is tectured and you can't really do anything wrong because you won't see it anyway. Now we still have to patch the holes but that will be done soon enough (we have tonnes of holes to patch all over the house from where the old owners hung their pictures vs where we have hung ours).  But this is what it looks like now!


 SO MUCH BETTER!!!  Now people can use the bathroom and not be trapped!


Since we are talking about the little lady, here she is a few weeks ago playing with an ant (the little black dot in front of her).  She was fascinated with it!!! She would get down on the ground and watch it! So funny!

Wednesday, March 21, 2012

Meghan Vs The Church Pew


I got a serious workout over the weekend!!  Remember my church pew turned outdoor bench (post here), well I grabbed my sand paper and power sander and decided to take a stab at sanding her (yes its a girl... a VERY BIG girl) down.  I had to sand her down and seal her as the indoor varnish was flaking off after one rain!! See the picture below you can see the flakes of finish. They honestly just fell off of the back of the bench when you wiped it with your hand! Not good.


I pulled out the power sander and immediately realized this was going to take a LOT longer than expected!!!  The problem was that the bench has a curved back and curved sides... in other words the power sander was not going to do a very good job on those parts.  So using the power of ... well ME... I went to work doing this the old fashion way, with a piece of sand paper and my arm.  OH BOY that was a work out. Just to remind you this bench is close to 9 feet long! The only thing I had going for me was that the finish on the back of the bench was already falling off so that part was easy, the seat was the difficult part but even that wasn't too bad.

After 2 hours of sanding I had a beautifully fresh and solid unfinished bench... I also had claw hands, shaky arms and back spasms.... but I was happy!  I forgot to take a picture of the bench completely sanded but below you can see the sanded bench with a bit of the new outdoor sealant on it on the right side. 


I chose Behr's Premium Weatherproofing Wood Finish in Transparent colour as I didn't want to change the colour of the wood.  After talking with the Home Depot guy this was my best/only option as I didn't want to buy a large can of the stuff and this was the only one they had that came in a small can.  Also I didn't want a stain, I liked the look of the unfinished wood and wanted to keep it that way.  This stuff was perfect! Plus it lasts 6 years outdoors before I have to put another coat of it on. 

I opened the can and using a foam brush I started to spread a thin even layer on the bench, it went on very easily and I was pleased until this happened....


 Yep my foam brush broke.... BUT it was my last foam brush and I was midway through putting in on the bench and I knew if I left and got a new brush you would forever see the line where I stopped... SO I proceeded with my broken foam brush (it was messier but worked).

About a half hour later this is what we I had!  Now it doesn't look much different from before... BUT now its weatherproofed and won't fall apart on us!!  Ryan did a second coat of finish on it over the weekend and we plan on doing one more coat just to make sure it lasts. But after the first coat it rained and the bench held up GREAT!  The water beaded on it which is exactly what we wanted, much better than soaking into the wood!!!
I think in the end I won the war against the pew...however I have MANY aches and pains after tackling her down!!  In fact I can't grip much of anything right now from gripping the sand paper for so long!!!!

Now I just need to make a cushion for the bench which I'm hoping to get to this weekend!

Monday, March 19, 2012

Dining Room Chair Reupholstered

I accomplished a lot this weekend despite a teething toddler who spent a lot of time melting down over the weekend!!!  Poor baby girl!  Between meltdowns I go a fair amount accomplished. I will post an update on the church pew progress later.  After looking at all of the material I purchased for the cushion for the outdoor pew I realized I bought WAAAAY too much material. I'm not sure what I was thinking.... I knew the pew was approximately 8.5 feet long.  Converted to metres that's about 3 metres... however I picked up 6 metres of fabric.  Who knows what conversion I was using at the time!!!!

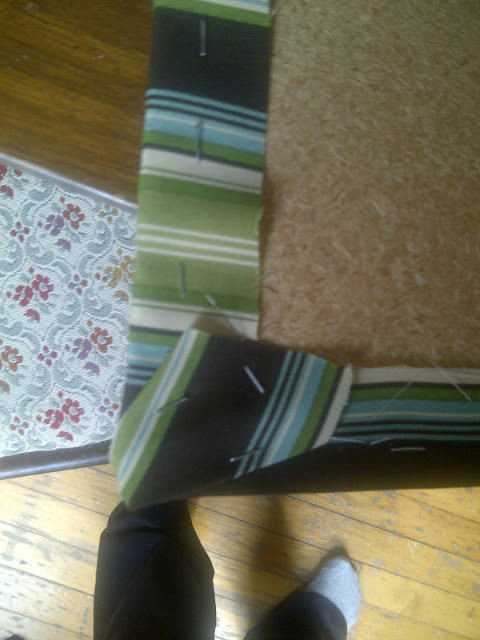
So after measuring it out I decided the fabric would look GREAT on the cushions of my dining room chairs!  Now we have 7 chairs, 4 came with our table and the other 3 we found at an antique store for $25 each and they are ALMOST identical.  However the 4 original chairs have a cream vinyl on them and the 3 newer chairs have a flowery material on them.  I figure since I have the fabric and love it lets match up my chairs.

Here is the one chair I took a stab at on the weekend.

Since I wasn't entirely sure what I was doing I figured I would test it out on one chair first before taking all of my chairs apart.  First I unscrewed the seat and pulled the old fabric off of seat.  The cushion was in great shape, the hardest part about this was taking the old fabric off... it was secured in place with I kid you not 100 plus staples!!!!!  Next time I'm using a staple remover and not my fingers!!! 

Next I used the old fabric as a template to cut out the new fabric.  Wrapped it around and using a friends staple gun (Thanks H) in a matter of 5 minutes I had accomplished this. Without using 100 plus staples!!!

The corners were a little tricky but I used the same technique the old material had been secured with and it worked nicely!

 Then I put the seat back onto the chair and realized 'oh crap the stripes are slightly crooked'.... Oh well. This was the first chair so with the next one I will make sure to put it on straight.  But I love the end result!!!
Now I just have 6 more chairs to do!

Thursday, March 15, 2012

Repurposed Church Pew

My parents church decided to sell off the old church pews from the old church.  My younger brother bought one, my older brother bought one and well we didn't want to be left out so we bought one too.  The price was whatever you wanted to donate. So for a wonderful $100 we had this beautiful church pew.

Now what are we going to do with an 8 foot long church pew you might ask.  WELL we figured it would be GREAT seating for our deck out back.  Ryan picked it up and brought it home on the weekend and we put it on the top level of our deck as extra seating for the table.  Our dining room walks right out onto the top level of our deck which the previous owners 'smartly' put a gate on to keep their 2 year old up there. I LOVE THIS!!! On the weekend we opened the french doors and Norah had a blast running inside and out visiting Daddy (while he worked in the yard) and Mommy while she cleaned the house. I loved it because I didn't have to worry about her falling! She was gated in!!! Plus the bars and close enough together there is no risk of her falling through or getting her head stuck (you hear about that happening a lot haahaa).
 But back to the pew! I was VERY happy about its positioning as it didn't interfer with the french doors (like the patio chairs did) and it looked great up there! (can you spot Norah having a snack in this photo??)
So we put it there Saturday and it rained Monday... so Tuesday I came home to Ryan in a panic. I took one look at the pew and went AHHHHHHHHHHHH @#$*@&%@@#&.  I knew we would have to put an outdoor sealant on it but I didn't think that after one small rain ALL of the old finish would come flaking off!! Yes FLAKING! To add to it the joints are all splitting apart!!!  We have covered it in a tarp until we can deal with it on the weekend.  The plan is to sand it down and put an outdoor stain/sealer on it. Its supposed to be GORGEOUS this weekend so I don't have a problem doing it!

The ultimate plan is to make pillows/cushions for the bench so it is a little more comfortable. I ran off to Fabricland on the weekend and picked up this pretty outdoor fabric to make cushions out of.  It goes nicely with the brown cushions we have for the patio chairs too.  I think I may have bought WAY too much material but at $4/metre I didn't mind. If I have extra I may recover our dining room chairs (that currently don't match at all... we have 4 with white vinyl seats and 3 with a flowery red/cream material that we got at an antique shop.... )


This weekend I plan to sand/seal the church pew, finish painting my chair from last weekend and bbq!!!! Stop on by for a bbq this weekend!!! :-)

Sunday, March 11, 2012

What to do on a beautiful Sunday morning??


While the rest of the world is relaxing with a coffee on a Sunday morning... I'm priming a chair!!!! And couldn't be happier!!!
It is gorgeous outside today!!!! While North was napping I took advantage of the beautiful morning and pulled the chair out of our bedroom, threw it on the back deck, turned my music up loud and sanded and primed her. This was what she looked like before.


I must admit this chair was MUCH easier to sand then I was expecting!! The stain came off VERY easily and in about a half hour it was sanded down.  Then out came the primer and that only took about 45 minutes.  Much less time than I was expecting! Its amazing how much a coat of primer changes a chair!!!
 
The details in the chair were a little finicky to get the paint in so I decided to use a sponge brush which easily got into all of those grooves

As you can tell I didn't care if I got paint on the material as I will be covering it with new material. I tried not to get too much or it would be crusty under the new material.
The front legs were the hardest as they had grooves and more grooves and even more deeper grooves.  But I managed to get it everywhere.  Now I just have to let it dry and then do a second coat of primer before painting it. 

Oh this project put a BIG smile on my face today. I've been in a funk lately and I couldn't explain it... I realized I haven't had time for ME lately and doing projects like this make me happy and give me my ME time. Some people may think I'm crazy for using my precious ME time to do a project like this but this is what I love to do.  I can relax when Norah goes to bed, but during the day when she's napping I like to get things done. (and I'm not talking chores... I'm talking doing things that I WANT to do!).

I'm so excited for this chair!!!!  Hopefully I can get the second coat of primer on this afternoon then paint it next weekend... fingers crossed!!!!