I would like to start off by saying I had no idea Smorgasbord was an actual word... Who knew spell check would correct my spelling!! Moving on!
I had high hopes of writing these posts before the new year however my little lady had a horrible cold and we spent the holidays sitting on the couch watching Monsters Inc more times then I want to admit!!!! So this is a post about all of the projects I have been dying to post for some time now!!
At the beginning of December a friend threw a Cookie Exchange Party. Norah and I were in a sugar coma for weeks afterwards!! But my one friend made these amazing 'cookies' that I HAD to make again! Mostly because they are SOOOOO simple!!! Literally they are Ritz Crackers dipped in chocolate... um yep its that simple!!! I had a bunch of candy cane Hershey Kisses on hand so I melted them up. I don't have a double boiler so I just used 2 small pots I had and put the water in the bottom one... worked just fine for me!
Then I rolled out some wax paper onto a cookie sheet and using a spoon I put a drop of the melted chocolate on the wax paper. Then put the Ritz Cracker on top and squished it around a bit. Then added another drop of the melted chocolate on top of the Ritz Cracker and smeared it around and threw the tray in the fridge so the chocolate could harden. They were DELICIOUS!!!!
Remember back
Here when I showed my Quietbook pages. Well I finally finished it and presented it to Norah on Christmas Eve. We decided to give it to her then because we were going to church and what better place to play with it!! Here are the rest of the pages.
I showed this page before. I sewed a rectangle onto the opposite page to hold all of the dolls clothes. Norah LOVES that the doll has shoes... its her favourite part!
This is the cover of the book. Norah had these 3 little finger puppets that were in a birthday card from her first birthday that she still loves playing with. So in the interest of time I sewed another rectangle on and shoved the puppets in the front!
I previously showed the Mr. Potatohead, all I did to make the page was sew on part of Mr. Potatohead leaving the top open so the pieces could be stored inside him. (sorry no pictures) The same went for the flower counting page. You can see those
here.
Finally I made a shape page using puffy paint! I traced out some shapes and cut them out of felt. Then using my puffy paint I traced the shape with a corresponding colour onto a page. Norah has a blast matching the shapes and colours!!
Now onto a fun last minute Christmas Gift that I made for all the little people in our life (ie. babies under 8 months). At that age Norah LOVED touchy feely books!! I decided to attempt to make some! Now mine didn't turn out like I wanted but the babies still love them!
I made the pages out of sheets of foam (non-toxic too!!) and used pinking sheers to make the edges pretty.
Then I thought out what I could use... puffy paint was an obvious choice for 'BUMPY'. Actually this was my favourite page of the entire book! I used a yellow paint marker for the lettering.
Next up I had some sparkly paper left over from a previous craft. I had planned to write 'sparkly red circle' however this was a key lesson in what not to do while watching tv... somehow I wrote Bright... OOPS!!! I think on at least ONE of the books I got it right... Oh well!! Lesson learned!
Next up I knew I wanted to do a 'Soft' page. And since I still had a bunch of felt leftover I pulled out some green and cut an oval!
Finally I had some shiny blue material left from the wings I made for Ryan and I for Halloween and cut a triangle out. I had some issues gluing it on but eventually it stuck on!
Finally I used a hole punch to punch some holes and tied the whole book together with some ribbon I had on hand. This project probably took me about 10 minutes per book but the kiddos love them and I couldn't be happier with the result!!! Plus it cost next to nothing to make!!
It is now 2013 and most people are setting out their resolutions. I have never been one for setting a resolution because I know I won't stick to it. However this year I am setting a goal of sorts. My goal is to organize my life... Yes its a broad topic but I have so many things on the go and everything seems to be in shambles. Organization would be key to making 2013 a fantastic year! To clarify a bit I have a million areas of the house that are literally a disaster!! I need to take the time to organize them better so they are functional for us. For instance, currently I can't even get into our storage/tool zone in the basement because there are a million boxes and tools blocking the way! Next our front hall is a disaster of shoes and coats constantly... I plan to enlist my dad to help us organize that. Our tiny main bathroom has non-functional storage that I plan to fix up. The office upstairs needs some serious TLC. Our laundry room has so much space but nothing is in its place so its a constant pile of junk. We have a huge shed but have never properly organized it so its bursting with junk! Life just needs organizing... I have yet to figure out how to juggle work, a little lady and cleaning a house!
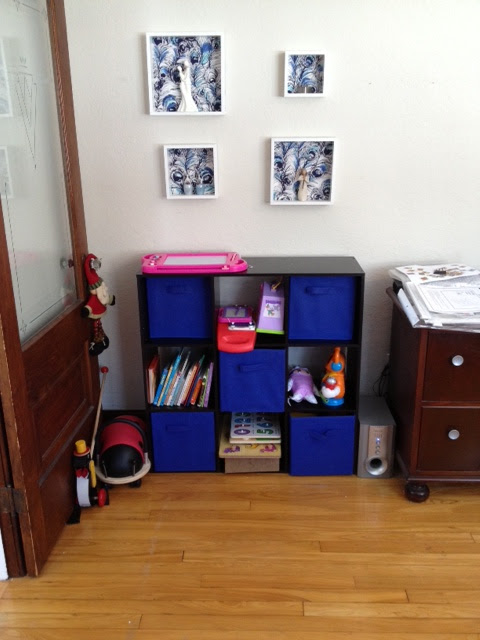
With all of that said... we got on our organization plan over the holidays. Previously Norah's toys were in baskets in her play area... then we were given a toy box which I thought would answer all of our problems. Nope... I would like to refer to the toy box as the box of 'wherediditgo'. It wasn't a deep box but Norah couldn't get anything out of it without help and it lead to frustration on her part. So over the holidays we invested in a toy shelf with baskets. It has been in the living room now for about a week and I LOVE it!! Norah LOVES it too! She can get all the toys she wants and her books are even in one spot (instead of all over our book shelf) which gives me more room for MY stuff!!
Finally on the organization track, we have a blank wall in the kitchen which we had previously hung a corkboard from a nail that was left by the old owners. The corkboard was functional but MUCH too low! When at Ikea a few months ago I came across some awesome organizers for the wall that I loved so I picked them up (I think they were like $15 or something). We rehung the corkboard higher and put the organizers on the wall. Now all of our bills/paperwork/pens etc that used to sit on the kitchen counter have a proper space for themselves!! I still plan to do something fun with the corkboard I just have to find the time and figure out what I want to do with it!!!